house insect eggs identification guide
Navigating the world of house insect eggs requires keen observation! This guide provides essential knowledge for identifying various eggs, aiding in early pest detection and control.

Insect eggs within homes often signal a hidden infestation, demanding prompt attention. These tiny capsules, frequently overlooked, represent the next generation of pests. Identifying them early is crucial for effective pest management. Understanding their appearance, preferred locations, and life cycles empowers homeowners to proactively address potential problems.
Different insects deposit eggs in diverse environments – cracks, crevices, furniture, and even plants. Recognizing these subtle signs can prevent minor issues from escalating into full-blown infestations, safeguarding your home and health.
Why Identifying Insect Eggs Matters
Early detection of insect eggs is paramount for effective pest control. Addressing an infestation at the egg stage prevents widespread population growth, minimizing damage and health risks. Ignoring these early signs allows pests to multiply rapidly, making eradication significantly more challenging and costly.
Proactive identification enables targeted treatments, reducing reliance on harsh chemicals. It also protects your property and belongings from extensive damage caused by established infestations, ensuring a healthier living environment.
General Characteristics of Insect Eggs
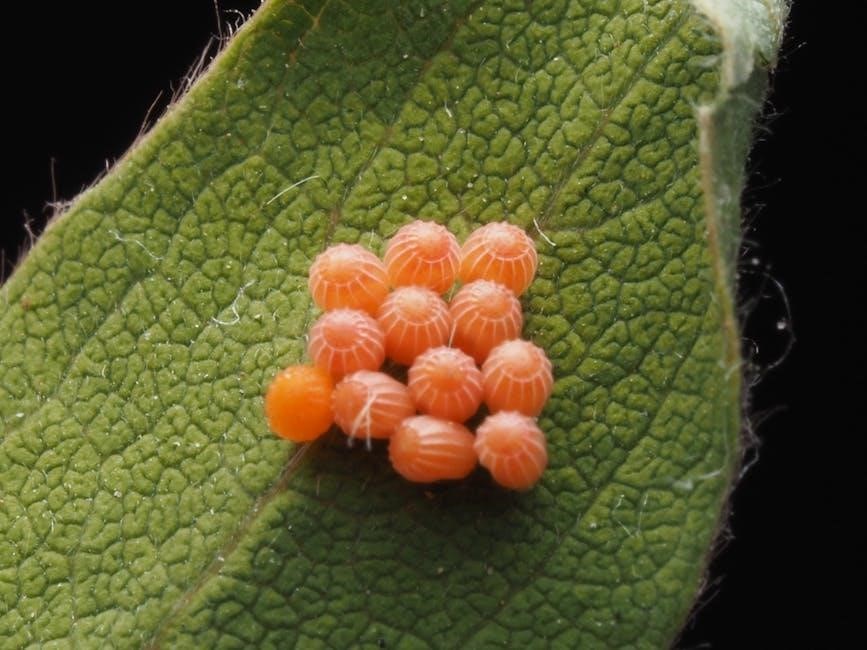
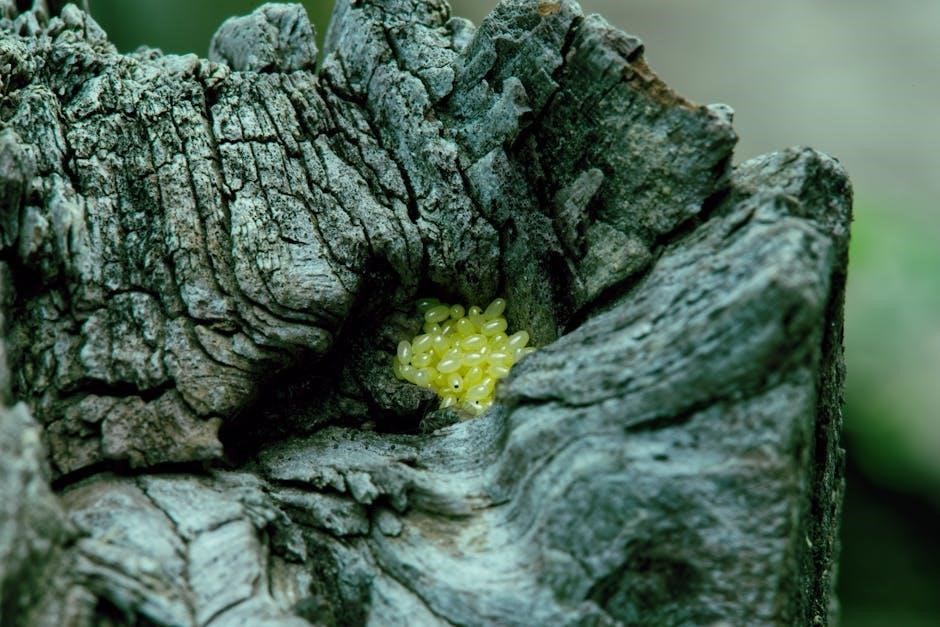
Insect eggs exhibit diverse characteristics, but some common traits aid identification. Size varies greatly, ranging from nearly microscopic to easily visible. Shape can be oval, round, or elongated, and color often ranges from white or yellowish to brown or even iridescent.
Eggs are frequently laid in clusters or rows, though some species deposit them singly. Texture can be smooth, ribbed, or sticky, depending on the species and environment. Location is crucial – eggs are often found in protected, hidden areas.
Common House Insect Eggs: A Detailed Look
Let’s examine the eggs of prevalent household pests! This section offers focused insights into bed bugs, cockroaches, ants, fleas, and whiteflies for accurate identification.
Bed Bug Eggs
Bed bug eggs are notoriously difficult to spot due to their incredibly small size and pale coloration. Typically, these eggs are white or yellowish, measuring approximately 1mm in length – about the size of a pinhead. They aren’t laid randomly; instead, they’re often deposited in clusters or rows in protected, secluded areas.
Finding these eggs is crucial for early intervention, but their resemblance to dust or debris can make detection challenging. Vigilance and a keen eye are essential when inspecting potential harborage sites.
Appearance of Bed Bug Eggs
Bed bug eggs possess a distinct, yet subtle, appearance that requires close inspection. These eggs are typically oval-shaped and incredibly tiny, averaging around 1 millimeter in length – comparable to the size of a pinhead. Their color ranges from pearly white to a pale yellowish hue, often making them blend seamlessly with surrounding surfaces.
They lack noticeable features, appearing smooth and somewhat translucent. Recognizing this diminutive size and coloration is the first step in successful identification.
Where to Find Bed Bug Eggs
Locating bed bug eggs demands a systematic search of potential harborage areas. These eggs are frequently deposited in areas close to where bed bugs feed and rest, often in dark, secluded spots. Common locations include mattress seams, box spring interiors, and bed frames.
Inspect cracks and crevices in nearby furniture, along baseboards, and behind headboards. Eggs are often found glued to surfaces, appearing in clusters or rows.
Distinguishing Bed Bug Eggs from Other Eggs
Differentiating bed bug eggs from similar-looking objects requires close examination. Their small size – about 1mm – and pale, whitish color can make them easily overlooked or mistaken for dust particles or fabric lint.
Unlike some insect eggs, bed bug eggs are typically not laid in neat patterns. They are often glued to surfaces and appear slightly elongated or oval. Use magnification for accurate identification!
Cockroach Eggs (Oothecae)
Cockroach eggs aren’t laid individually; they’re encased in protective capsules called oothecae. These capsules vary in shape and size depending on the cockroach species, ranging from small and oval to elongated and purse-shaped.
Oothecae are typically reddish-brown or dark brown, providing a distinct visual cue. They feel leathery or slightly hardened to the touch. Identifying the ootheca type is crucial for pinpointing the cockroach species present in your home.
Types of Cockroach Oothecae
German cockroach oothecae are small, oblong, and reddish-brown, holding around 30-40 eggs. American cockroach oothecae are larger, dark reddish-brown, and resemble a small, elongated capsule, containing about 16 eggs.
Oriental cockroach oothecae are dark reddish-brown, almost black, and resemble tiny purses. Smokybrown cockroach oothecae are larger, darker, and often glued to surfaces. Recognizing these differences aids in accurate species identification and targeted pest control strategies.
Identifying Different Cockroach Species Eggs
Distinguishing cockroach eggs relies on ootheca characteristics. German cockroach oothecae are small, brown, and carried by the female until hatching. American cockroach cases are larger, reddish-brown, and glued to surfaces.
Oriental cockroach oothecae are dark and purse-shaped, while smokybrown cases are larger and darker still. Size, shape, color, and attachment method are key identifiers. Accurate identification informs effective treatment plans, targeting the specific cockroach species present.
Cockroach Egg Case Locations
Cockroach oothecae are strategically deposited in sheltered areas. German cockroaches favor warm, humid spots like kitchen cabinets, drawers, and behind appliances. American cockroaches often attach cases to floors, walls, or in basements.
Oriental cockroaches prefer damp, cool locations such as drains and crawl spaces. Identifying these common hiding spots is crucial for effective pest control. Regular inspections of these areas can reveal early signs of infestation and allow for prompt action.
Ant Eggs
Ant eggs are small, oval, and typically white, resembling tiny grains of rice. They are often found within nests, which can be located in walls, under floors, or outdoors. Distinguishing them can be tricky, as they are easily mistaken for sugar or salt granules.
Ants diligently move their eggs to maintain optimal conditions. Finding these eggs indicates a mature colony presence within or near your home, necessitating further investigation and potential pest control measures.
Appearance and Size of Ant Eggs
Ant eggs are remarkably small, typically measuring around 1-2 millimeters in length. Their shape is generally oval or slightly elongated, and they possess a pearly white coloration. Newly laid eggs can appear translucent, becoming more opaque as they develop.
Unlike insect larvae, ant eggs lack legs or distinct features. Their diminutive size and subtle appearance often make them difficult to spot without close inspection, requiring a magnifying glass for accurate identification.
Ant Egg Locations within the House
Ants typically nest within walls, under floors, and in other concealed areas of a home. Consequently, ant eggs are most often found near these nesting sites. Look for them in cracks and crevices, behind appliances, and within wall voids.
They are rarely seen in open areas, as worker ants diligently relocate eggs to protect them. Damp locations, like bathrooms and kitchens, are also common, as ants require moisture for egg development.
Distinguishing Ant Eggs from Other Small White Objects
Ant eggs are often mistaken for sugar granules or salt crystals due to their small, pearly-white appearance. However, unlike crystals, ant eggs are slightly oval and possess a delicate, translucent quality.
They lack the sharp edges of salt or sugar. Carefully observe the objects; if they appear to move or are clustered together, they are likely ant eggs. Magnification can also reveal their subtle shape.
Flea Eggs
Flea eggs are incredibly small, white, and oval-shaped, resembling tiny grains of salt. They are not typically attached to the host animal but rather fall off into carpets, cracks in flooring, pet bedding, and upholstery.
Identifying flea eggs can be challenging due to their size and abundance. Look closely in areas where pets spend the most time. The presence of “flea dirt” (flea feces) is often a more obvious sign of infestation.
Appearance of Flea Eggs
Flea eggs are remarkably tiny, measuring only about 0.5mm in length – almost invisible to the naked eye! They possess a smooth, pearly-white appearance and an oval shape. Often described as resembling miniature grains of salt, they lack any noticeable coloration or markings.
Their diminutive size and pale hue contribute to the difficulty in spotting them amidst fibers and dust. Careful inspection under magnification is often required for accurate identification.
Where Flea Eggs are Typically Found
Flea eggs are commonly deposited in areas frequented by the host animal – your pets! Look for them in pet bedding, carpets, rugs, and upholstered furniture where your animals spend significant time. They readily fall off the host and disperse into the surrounding environment.
Cracks in flooring, along baseboards, and within pet resting areas are prime locations. High-traffic zones and areas with accumulated pet hair are also likely spots for finding these tiny eggs.
Challenges in Identifying Flea Eggs
Identifying flea eggs presents unique difficulties due to their incredibly small size and pale coloration. They are often mistaken for dust particles or dandruff, making visual detection challenging without magnification. Their tendency to fall off the host and scatter further complicates the process.
The eggs lack noticeable features, blending seamlessly with fabrics and surfaces. Distinguishing them from other small white debris requires careful examination and a keen eye, often aided by a magnifying glass.
Whitefly Eggs
Whitefly eggs are remarkably small and typically appear as tiny, oval-shaped objects, often exhibiting a pale yellow or white hue. Adult whiteflies strategically deposit these eggs on the undersides of plant leaves, creating distinctive patterns.
These patterns often manifest as concentric circles or scattered distributions, aiding in identification. Observing these egg-laying locations is crucial for early detection and intervention, preventing widespread infestations within the house.
Appearance and Pattern of Whitefly Eggs
Whitefly eggs are incredibly minute, appearing as almost translucent, oval-shaped specks, generally white or pale yellow. They are exceptionally small, often difficult to see with the naked eye, requiring close inspection.
A defining characteristic is their laying pattern: adults deposit eggs in a very specific, organized manner. Typically, they arrange them in circular or semi-circular patterns on the undersides of leaves, creating a distinctive, easily recognizable visual cue.
Identifying Whitefly Egg Locations on Plants
Whitefly eggs are predominantly found on the undersides of plant leaves, a crucial detail for identification. Focus your search on newer, younger foliage as adults prefer to lay eggs where fresh growth is available.
Look closely for the characteristic circular or spiral patterns where eggs are deposited. Heavily infested plants will exhibit numerous, visible colonies. Inspect common houseplants and garden vegetables, as these are frequent targets for whitefly infestations.
Whitefly Egg Life Cycle
The whitefly egg stage typically lasts between 5 to 12 days, dependent on environmental conditions like temperature and humidity. Upon hatching, tiny crawlers emerge and immediately begin feeding on plant sap, initiating the next phase.
These crawlers settle and transform into scale-like nymphs, eventually maturing into winged adults. This rapid lifecycle allows for quick population growth, emphasizing the need for consistent monitoring and prompt intervention to prevent widespread infestations.
Less Common, But Important, House Insect Eggs
While less frequently encountered, certain insect eggs demand attention due to potential damage or invasive characteristics. Vigilance is key for effective control!
Spotted Lanternfly Eggs
Appearance of Spotted Lanternfly Egg Masses: These eggs are laid in masses covered with a grayish-brown, mud-like coating, resembling dried clay. Initially, they appear smooth but can crack over time. Each mass typically contains 30-50 individual eggs.
Identifying Spotted Lanternfly Egg Locations: Look for these masses on trees (especially Tree of Heaven), outdoor furniture, vehicles, rocks, and even buildings. They are often found on the undersides of branches or smooth surfaces.
Seasonal Identification of Spotted Lanternfly Eggs: Egg masses are primarily visible from fall through early spring before hatching. Early detection and scraping off the masses are crucial for control efforts.
Appearance of Spotted Lanternfly Egg Masses
Distinctive Characteristics: Spotted lanternfly egg masses are quite unique, appearing as rows of roughly 30-50 individual eggs. They’re encased in a protective coating that initially looks smooth and grayish-brown, often described as resembling dried mud or clay.
Color and Texture Changes: Over time, this coating can develop cracks and a slightly weathered appearance. The eggs themselves are small and brownish, but are obscured by the outer layer. Freshly laid masses are often more uniform in color.
Identifying Spotted Lanternfly Egg Locations
Preferred Surfaces: Spotted lanternfly egg masses are frequently found on outdoor surfaces, including trees (especially the tree of heaven), rocks, outdoor furniture, vehicles, and even buildings. They favor smooth surfaces but can adhere to rougher textures too.
Height and Visibility: Look for egg masses at varying heights, often several feet off the ground. Careful inspection of tree trunks, branches, and the undersides of structures is crucial for early detection and control efforts.
Seasonal Identification of Spotted Lanternfly Eggs
Fall & Winter Appearance: Egg masses are most visible from fall through early spring, appearing as grayish-brown, mud-like coverings. These masses can resemble dried mud or old cement, making them easily overlooked. Careful scrutiny is key during these dormant months.
Spring Hatching: As temperatures rise in spring, eggs begin to hatch. Look for newly hatched nymphs emerging from the egg masses, signaling the start of the active season and the need for increased monitoring.
Silverfish Eggs
Appearance and Size: Silverfish eggs are incredibly small, typically pearly white, and oval-shaped, measuring only about 1-2mm in length. Their diminutive size makes them difficult to spot with the naked eye, often requiring magnification for proper identification.
Egg Laying Habits: These eggs aren’t laid in large, obvious masses. Instead, silverfish deposit them individually or in small groups within cracks, crevices, and hidden, humid locations throughout the house.
Appearance and Size of Silverfish Eggs
Detailed Description: Silverfish eggs are remarkably tiny, generally pearly white, and possess an elongated oval shape. Measuring approximately 1-2 millimeters in length, they are exceedingly difficult to discern without the aid of magnification. Their translucent appearance further complicates visual detection.
Microscopic Characteristics: Upon closer inspection, a slight elongation and smooth texture become apparent. These eggs lack any prominent markings or coloration, blending seamlessly with their surroundings.
Silverfish Egg Laying Habits
Concealed Deposition: Silverfish demonstrate a preference for depositing their eggs in secluded, warm, and humid environments. These locations often include cracks and crevices within walls, behind baseboards, and inside storage areas. They typically lay eggs individually or in small, scattered groups.
Protective Strategy: Unlike some insects, silverfish do not create elaborate egg cases or masses. Instead, they strategically place eggs in areas offering protection from disturbance and desiccation, ensuring optimal development.
Identifying Silverfish Presence Through Eggs
Subtle Indicators: Discovering silverfish eggs can be challenging due to their small size and scattered deposition. However, consistently finding tiny, pearly-white, oval-shaped eggs in hidden areas—like bookshelves or closets—suggests a potential infestation.
Combined Evidence: Egg sightings should be considered alongside other signs, such as the presence of silverfish themselves, their characteristic droppings (small, pepper-like specks), and damage to paper goods or fabrics, for accurate assessment.

Clothes Moth Eggs
Microscopic Beginnings: Clothes moth eggs are incredibly small, appearing as tiny, translucent or whitish specks—often nearly invisible to the naked eye. They are typically laid directly on natural fibers like wool, silk, or fur, providing a food source for the hatching larvae.
Hidden Locations: Inspect dark, undisturbed areas within closets, drawers, and storage containers. Finding eggs alongside shed larval skins or damaged fabrics confirms a clothes moth presence.
Appearance of Clothes Moth Eggs
Minute and Translucent: Clothes moth eggs are exceedingly small, measuring approximately 0.5mm in length – about the size of a pinhead, but often much smaller and harder to see. They possess an oval or slightly elongated shape and are typically a pearly white or translucent color, making them blend seamlessly with fabrics.
Texture and Clustering: These eggs have a smooth texture and are often laid singly or in small, scattered clusters directly onto susceptible materials like wool or silk.
Where to Find Clothes Moth Eggs
Hidden Havens: Clothes moth eggs are typically deposited in dark, undisturbed areas where adult moths can lay their eggs close to food sources for the larvae. Prime locations include inside closets, particularly on garments made of natural fibers like wool, silk, and cashmere.
Other Common Spots: Look for eggs in storage containers, drawers, and even within the fibers of rugs, upholstery, and blankets. Infestations often begin in infrequently used clothing.
Signs of Clothes Moth Infestation Beyond Eggs
Visible Damage: Beyond the eggs themselves, look for actual damage to fabrics – irregular holes are a key indicator. This damage isn’t always immediately apparent, starting subtly within the fibers.
Larval Casings: Discovering translucent, silken tubes or casings where larvae have fed is a strong sign. Also, observe the presence of adult moths, though they’re often less frequently seen. A musty odor can also indicate an established infestation.
Tools and Techniques for Identification
Effective identification relies on magnification and illumination! Utilize a magnifying glass, proper lighting, and clear photographs to accurately assess suspected insect eggs.
Using a Magnifying Glass
A magnifying glass is an indispensable tool for identifying minute insect eggs! Many eggs are incredibly small, often appearing as mere specks to the naked eye. A magnification of 10x to 20x is generally sufficient for detailed observation. Carefully examine potential egg locations – cracks, crevices, furniture seams, and plant undersides – with the magnifying glass.
Focus on shape, size, color, and arrangement. Note if the eggs are laid individually, in rows, or in clusters. This detailed examination significantly increases the accuracy of your identification efforts, allowing for prompt action against potential infestations.
Proper Lighting for Egg Identification

Adequate lighting is crucial when searching for and identifying insect eggs! Dimly lit areas can obscure these tiny clues, making detection incredibly difficult. Utilize a bright, focused light source, such as a flashlight or headlamp, to illuminate potential egg-laying sites.
Direct the light at various angles to reveal subtle textures and shapes. Avoid glare, which can hinder visibility. Combining a magnifying glass with proper lighting dramatically improves your ability to accurately identify even the smallest insect eggs, leading to faster pest control.

Taking Clear Photographs for Identification
Documenting potential insect eggs with clear photographs is incredibly valuable! Sharp, well-lit images aid in accurate identification, especially when seeking expert opinions. Ensure the egg(s) are in focus, and include a scale (like a ruler or coin) for size reference.
Capture multiple angles and close-ups. Good lighting minimizes shadows and reveals crucial details. These photos become essential records for pest control professionals, facilitating effective treatment strategies and preventing future infestations.
Preventing Insect Egg Infestations
Proactive measures are key to preventing egg deposits! Maintaining cleanliness, sealing entry points, and regular inspections drastically reduce the risk of infestations.
Maintaining Cleanliness
A consistently clean home is a significant deterrent to many insect infestations. Regularly vacuuming carpets, rugs, and upholstery removes potential egg-laying sites and food sources. Frequent dusting eliminates settled debris where eggs can hide. Promptly cleaning up spills and crumbs denies nourishment for pests.
Pay close attention to kitchens and dining areas, as these attract insects seeking food. Thoroughly clean under appliances and furniture. Regularly empty trash receptacles and ensure they have tight-fitting lids. A clutter-free environment also reduces hiding places for both insects and their eggs, making detection easier.
Sealing Cracks and Crevices
Insects often exploit tiny openings to enter homes and deposit eggs in protected areas. Thoroughly inspect the foundation, walls, and around pipes for cracks and crevices. Use caulk or sealant to close these entry points, preventing access for pests. Pay attention to areas where utilities enter the house, such as around wires and plumbing.
Seal gaps around windows and doors with weather stripping. Ensure screens are intact and properly fitted. Addressing these structural vulnerabilities significantly reduces the risk of infestation and egg-laying within your home’s interior.
Regular Pest Control Inspections
Proactive pest control inspections are crucial for early detection of insect eggs and preventing widespread infestations. Schedule routine checks with a qualified pest control professional, ideally quarterly or bi-annually. Inspectors can identify hidden egg-laying sites and potential problem areas you might miss.
They possess specialized knowledge and tools to accurately assess the risk and recommend appropriate treatment strategies. Consistent inspections offer peace of mind and safeguard your home from damaging pest populations.
Early Detection and Response
Prompt action is vital when discovering insect eggs! Immediate response significantly limits infestation growth and potential damage. Upon identifying eggs, thoroughly inspect surrounding areas for adult insects and further egg deposits. Vacuum suspected areas meticulously, disposing of the bag immediately outdoors.
Consider contacting a pest control professional for targeted treatment and preventative measures. Swift intervention prevents minor issues from escalating into costly and extensive problems.