
blackstone grill instructions
Welcome to the ultimate guide for mastering your Blackstone grill! This comprehensive resource covers setup, maintenance, and expert cooking tips to enhance your outdoor culinary experience․
1․1 Understanding the Basics of Blackstone Grills
Blackstone grills are versatile, durable, and designed for outdoor cooking․ They feature a flat-top surface heated by propane burners, ideal for searing, frying, and griddling․ Known for excellent heat distribution, these grills are popular among home cooks and professionals, offering a unique cooking experience with minimal cleanup and maintenance․
1․2 Importance of Proper Setup and Maintenance
Proper setup and maintenance are crucial for optimal performance and longevity of your Blackstone grill․ Ensuring a level surface, seasoning the griddle, and regular cleaning prevent rust and food sticking․ Proper care enhances cooking results and extends the lifespan of your grill, ensuring it remains a reliable outdoor cooking companion for years․
Setting Up Your Blackstone Griddle for the First Time
Setting up your Blackstone griddle involves unpacking, leveling, and seasoning․ Ensure a stable surface, lock casters, and apply initial seasoning for a non-stick surface and optimal performance․
2․1 Unpacking and Organizing Components
Begin by carefully unpacking all components from the box, ensuring no parts are damaged․ Organize items like burners, griddle top, propane connectors, and hardware in a clean workspace for efficient assembly and setup․
2․2 Choosing a Level and Stable Location
Select a flat, stable surface like a patio, deck, or yard for your Blackstone grill․ Ensure the area is even to prevent tipping and uneven heat distribution․ Use a spirit level to confirm balance and avoid placing the grill on combustible or uneven ground for safety and optimal performance․
2․3 Initial Seasoning Process
Seasoning your Blackstone griddle is essential for non-stick performance and durability․ Apply a thin, even layer of oil, such as flax or vegetable oil, across the surface․ Heat the griddle to 400°F for 30 minutes, letting the oil polymerize․ Repeat this process 2-3 times before first use for a well-seasoned finish;
Understanding Blackstone Grill Components
Familiarize yourself with key components like burners, heat controls, propane tanks, and the griddle surface․ These elements ensure efficient cooking and durability, enhancing your grilling experience․
3․1 Burners and Heat Controls
Blackstone grills feature multiple burners with independent heat controls, allowing precise temperature adjustment․ This setup enables zone cooking, where different areas can be set to specific heat levels, ensuring versatility for searing, simmering, or keeping food warm․ Proper use of these controls maximizes cooking efficiency and prevents overheating or undercooking․
3․2 Propane Tank Setup and Safety
Ensure your propane tank is securely connected to the grill, following the manufacturer’s guidelines․ Always store the tank upright in a well-ventilated area away from heat sources․ Check for leaks by applying soapy water to connections—bubbles indicate a leak․ Never use indoors or near flammable materials to maintain safety and prevent hazards․
3․4 Griddle Surface and Accessories
The griddle surface is durable and designed for even heat distribution․ Regular seasoning is essential to prevent rust and maintain non-stick performance․ Accessories like griddle tools, cleaning bricks, and covers enhance functionality and longevity․ Proper care ensures your Blackstone griddle remains in optimal condition for years of delicious cooking experiences․

Safety Precautions and Best Practices
Always ensure propane is handled safely, maintain proper ventilation, and keep flammable materials away․ Regularly inspect burners and hoses for leaks to prevent accidents․
4․1 Outdoor Usage Guidelines
Position your Blackstone grill on a level, heat-resistant surface outdoors, away from flammable materials․ Ensure the area is well-ventilated to prevent gas buildup․ Avoid operating in garages or enclosed spaces․ Keep the grill stable and secure to prevent accidental tipping․ Always follow local fire safety regulations during use․
4․2 Proper Ventilation and Fire Safety
Ensure proper ventilation by using your Blackstone grill in well-ventilated areas, away from flammable materials․ Keep a fire extinguisher nearby and maintain a safe distance from buildings․ Never operate the grill in enclosed spaces, as this can lead to carbon monoxide buildup or fire hazards․ Always prioritize safety during outdoor cooking․
4․3 Handling Propane and Heating Elements Safely
Always check propane tank levels before cooking and ensure connections are secure to prevent leaks․ Use a lighter for ignition, avoiding matches or open flames near the grill․ Keep the grill clean and clear of debris to maintain even heat distribution․ Monitor for propane odors or unusual sounds during operation․

Igniting and Preheating the Grill
Turn on the burners and use a lighter to ignite the grill․ Allow the griddle to preheat for 10-15 minutes before cooking to ensure even heat distribution․
5․1 Steps to Ignite the Burners
Ensure the propane tank is turned on and has sufficient fuel․ 2․ Turn the burner knob to the “light” position․ 3․ Use a lighter or ignition button to ignite the burner․ 4․ Confirm the flame appears and adjust heat as needed for even cooking․
5․2 Preheating the Griddle Surface
Turn all burners to high and let the griddle preheat for 10-15 minutes․ 2․ Use a thermometer to ensure the surface reaches 400°F for optimal cooking․ 3․ While preheating, prepare your food and cooking utensils․ 4․ Once preheated, reduce heat as needed and begin cooking․ Proper preheating ensures even heat distribution and prevents sticking․
5․3 Achieving Optimal Temperature
Achieve optimal temperature by preheating the griddle to 400°F using a thermometer․ Adjust burners to maintain consistent heat, ensuring even cooking․ For delicate foods, reduce heat; for searing, increase․ Monitor temperature closely to avoid overheating, which can damage the griddle or burn food․ Proper heat control is key to perfect results․
Cooking Techniques and Tips
Master essential techniques like searing, zone cooking, and even heat distribution․ Always oil the griddle before cooking and preheat to desired temperatures; Experiment with recipes and ensure food is handled safely for perfect results every time․
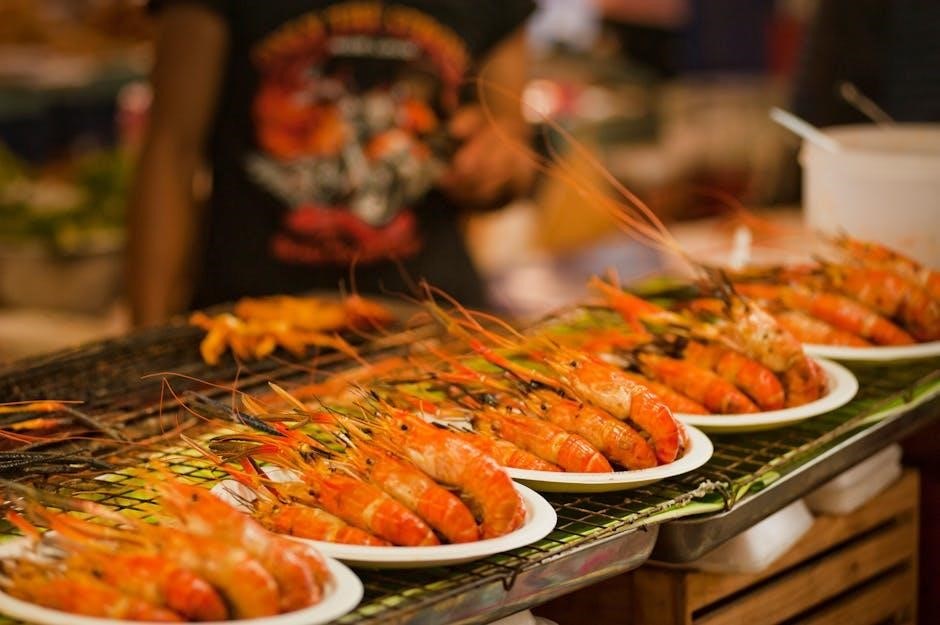
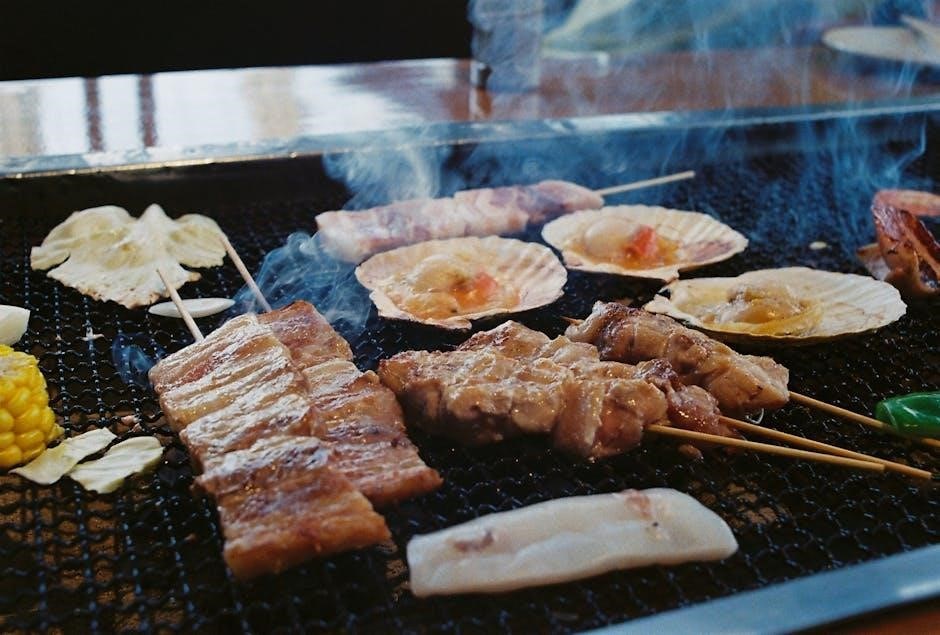
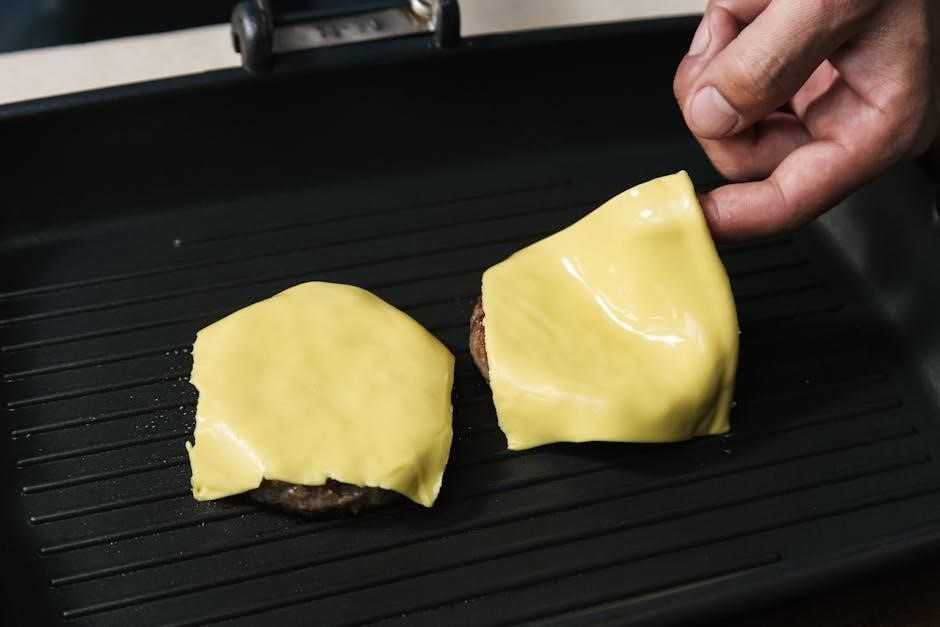
6․1 Searing and Cooking Zones
Optimize your Blackstone griddle by utilizing searing zones for high-heat cooking and cooler zones for simmering․ This technique ensures evenly cooked dishes․ Properly preheating the griddle and using the right oils enhances searing, while managing heat distribution prevents hotspots, allowing for precise control over your cooking process and achieving restaurant-quality results․
6․2 Oil and Seasoning Before Cooking
Properly oiling and seasoning your Blackstone griddle is essential for non-stick performance․ Use recommended oils like canola or flax oil for seasoning․ Apply thin layers, heating until smoke appears, repeating for durability․ Clean the griddle and re-season after use to maintain its surface and prevent rust, ensuring optimal cooking results every time․
6․3 Managing Heat Distribution
Ensure even heat distribution by preheating your Blackstone griddle thoroughly․ Adjust burners to create zones for searing, simmering, and warming․ Use the entire surface to manage different cooking tasks simultaneously, preventing hotspots․ This technique allows for efficient cooking and prevents food from burning, ensuring a perfect finish every time․
Cleaning and Maintaining the Grill
Regular cleaning and maintenance are crucial for extending the life of your Blackstone grill․ Use a scraper to remove residue, then wipe with mild soap and water․ Avoid abrasive cleaners and always oil the surface after cleaning to prevent rust and maintain seasoning․
7․1 Post-Cooking Cleaning Process
After cooking, allow the griddle to cool slightly․ Scrape off food residue with a metal scraper or spatula․ Wipe the surface with a paper towel, then clean with mild soap and water․ Rinse thoroughly and dry with a clean towel․ Apply a thin layer of oil to maintain seasoning and prevent rust․
7․2 Deep Cleaning and Rust Prevention
For deep cleaning, mix equal parts water and vinegar or baking soda and water to create a paste․ Apply to the griddle and let it sit for 30 minutes․ Scrub with a stiff brush and rinse․ Dry thoroughly and apply a thin layer of oil to prevent rust and maintain seasoning․
7․3 Regular Maintenance Tips
Regularly clean the griddle after each use with a paper towel and apply a thin layer of oil to prevent rust․ Store in a dry, covered area during off-seasons․ Inspect for rust spots and address them promptly by cleaning and re-seasoning․ Consistent maintenance ensures longevity and optimal performance of your Blackstone grill․

Seasoning and Re-Seasoning the Griddle
Seasoning is crucial for preventing rust and enhancing non-stick performance․ Apply thin oil layers, letting each coat smoke off before reapplying․ Repeat for durability and optimal cooking results․
8․1 Initial Seasoning Process
Start by cleaning the griddle surface thoroughly․ Apply a thin, even layer of recommended oil, such as flax or vegetable oil, using a paper towel․ Place the griddle over medium heat until the oil smokes, indicating polymerization․ Repeat this process 2-3 times for a durable, non-stick finish․
8․2 Re-Seasoning After Cleaning
After cleaning, re-seasoning restores the griddle’s non-stick surface․ Apply a thin layer of recommended oil, heat the griddle until it smokes, and let it cool․ Repeat once or twice for optimal results, ensuring the surface remains protected and ready for cooking․
8․3 Choosing the Right Oils for Seasoning
Selecting the right oil is crucial for seasoning your Blackstone griddle․ Use high-smoke-point oils like canola, flaxseed, or vegetable oil for durability․ Flaxseed oil is ideal for initial seasoning, while vegetable or canola oil works well for maintenance․ Avoid olive oil as it can leave a sticky residue and prevent proper polymerization․
Troubleshooting Common Issues
Address rust spots with oil and re-seasoning․ Fix sticky surfaces by cleaning and reapplying thin oil layers․ Resolve propane issues by checking connections and ensuring proper tank setup․
9․1 Dealing with Rust Spots
If rust appears, clean the area thoroughly with a stiff brush and mild soap․ Wipe dry, then apply a thin layer of oil and re-season the griddle․ Repeat seasoning several times to restore the surface․ Regular maintenance and proper storage can prevent rust from forming in the future․
9․2 Fixing a Sticky Griddle Surface
If your griddle feels sticky, clean it with a scraper and mild soap․ Rinse thoroughly, dry, and apply a thin layer of oil․ Re-season the surface by heating it and letting the oil smoke off․ Avoid using harsh chemicals, as they can damage the seasoning․ Regular maintenance keeps the griddle non-stick․
9․3 Resolving Propane Connection Problems
If you encounter issues with your propane connection, start by ensuring the tank is turned off and checking for leaks using soapy water; Inspect the hose and connections for damage or blockages․ Tighten any loose fittings and ensure the tank is adequately secured․ If problems persist, consult a professional for assistance․
Advanced Tips for Experienced Users
Master zone cooking, experiment with new recipes, and explore accessory integration to elevate your Blackstone grilling experience to the next level with precision and creativity․
10․1 Mastering Zone Cooking
Zone cooking on your Blackstone grill allows precise temperature control․ Divide the griddle into hot and cool zones for searing and finishing dishes․ Use the outer edges for lower heat, perfect for vegetables or warming․ This technique ensures even cooking and prevents overheating, enhancing your culinary skills and meal quality significantly․
10․2 Using Accessories for Enhanced Cooking
Enhance your Blackstone grill experience with essential accessories․ A griddle cover protects and maintains heat, while grill grates add smoky flavor․ Use a grill mat for non-stick cooking and easy cleanup․ These tools expand your cooking versatility, ensuring perfectly cooked meals every time and elevating your outdoor cooking sessions to new heights․
10․3 Experimenting with New Recipes
Take your Blackstone grill to the next level by experimenting with diverse recipes․ From hearty breakfast skillets to seared steaks and even desserts, the griddle’s versatility shines․ Don’t be afraid to try new marinades, seasonings, and cooking techniques․ The even heat distribution and large surface area make it perfect for creative and flavorful dishes․
Mastering your Blackstone grill opens doors to endless culinary possibilities․ With proper care and practice, it becomes a trusted companion for outdoor cooking adventures․ Happy grilling!
11․1 Summary of Key Instructions
Proper setup, regular seasoning, and maintenance are crucial for optimal performance․ Always ensure a level surface, preheat thoroughly, and clean post-cooking․ Use appropriate oils for seasoning and store the grill safely․ Follow safety guidelines for propane and ventilation․ Experiment with recipes and techniques to maximize your Blackstone grilling experience․
11․2 Encouragement for Continuous Learning
Mastering your Blackstone grill is a journey! Keep experimenting with new recipes and techniques to refine your skills․ Develop your unique cooking style and explore the endless possibilities outdoor grilling offers; Practice makes perfect, so don’t hesitate to try new ideas and enjoy the process of becoming a grilling expert!