
vertical metal siding installation guide pdf
Vertical metal siding is a popular choice for exterior cladding, offering durability and aesthetic appeal. This guide provides a comprehensive overview of the installation process, including key considerations for preparation, tools, and best practices to ensure a successful project. Whether you’re a homeowner or contractor, this resource will help you navigate the steps required to achieve professional-looking results.
- Understanding the basics of vertical metal siding.
- Planning and preparing for a smooth installation.
- Mastering the techniques for a flawless finish.
Get started with confidence and transform your property with vertical metal siding!
1.1 What is Vertical Metal Siding?
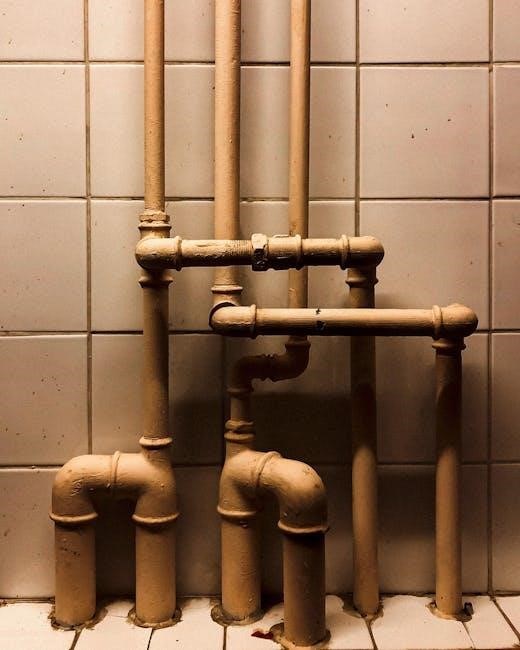
Vertical metal siding refers to exterior wall cladding made from metal panels installed vertically. It is a durable, low-maintenance option available in materials like steel, aluminum, or zinc. The panels are designed with various finishes, such as galvanized, painted, or textured, and come in profiles like corrugated, ribbed, or smooth. Vertical siding is known for its weather resistance, fire safety, and modern aesthetic appeal. It is a popular choice for both residential and commercial buildings, offering versatility in design while providing long-lasting protection against environmental elements.
1.2 Benefits of Vertical Metal Siding
Vertical metal siding offers numerous advantages, making it a preferred choice for modern construction. It is highly durable, resistant to weather, pests, and fire, ensuring long-lasting protection. The siding requires minimal maintenance, as it resists rot, mold, and fading. Its smooth, sleek appearance enhances curb appeal, while its versatility allows for various design options. Additionally, metal siding is eco-friendly, as it can be recycled and may qualify for energy efficiency incentives. Its ability to withstand harsh conditions and reduce noise makes it an excellent choice for both residential and commercial applications, providing a combination of functionality and aesthetic appeal.
- Durable and long-lasting.
- Low maintenance requirements.
- Weather and fire resistant.
- Eco-friendly and energy efficient.
- Modern and versatile design options.
Preparation and Planning
Before installing vertical metal siding, assess the wall condition, gather tools, and ensure safety measures. Check for obstructions and ensure the surface is level and clean. Proper planning prevents delays and ensures a smooth installation process.
- Inspect the wall for damage or unevenness.
- Gather necessary tools and materials.
- Plan the layout to achieve desired aesthetics.
2.1 Tools and Materials Needed
To successfully install vertical metal siding, gather essential tools and materials. These include measuring tape, level, screwdrivers, drills, metal shears, fasteners, flashing, weatherproof sealant, and safety gear like gloves and goggles. Proper tools ensure accurate cuts and secure fastening, while materials like sealant and flashing prevent water intrusion. Having everything ready streamlines the installation process and avoids delays. Ensure all items are of high quality to achieve a durable and professional finish.
- Measure and mark panels accurately with a tape measure and level.
- Cut panels safely using metal shears or a saw.
- Secure panels with appropriate fasteners for long-lasting results.
2.2 Site Preparation and Safety Measures
Before starting the installation, ensure the site is prepared and safe. Clear the area of debris and obstructions. Check the wall surface for evenness and structural integrity. Wear safety gear like gloves, goggles, and a dust mask. Ensure proper ventilation and avoid working in hazardous weather conditions. Secure loose items that could cause accidents. Use ladders and scaffolding safely, following manufacturer guidelines. Proper preparation prevents delays and ensures a secure working environment. Neglecting safety measures can lead to injuries or installation errors, so always prioritize caution and readiness.
- Clear the workspace of debris and obstructions.
- Wear appropriate safety gear for protection.
- Ensure structural integrity of the wall surface.
2.3 Measuring and Estimating Materials
Accurate measuring and material estimation are critical for a successful vertical metal siding installation. Measure the wall height, width, and any obstructions to calculate the total area. Add 10-15% to account for cuts and waste. Use a tape measure and calculator to determine the number of panels, fasteners, and flashing needed. Double-check measurements to avoid shortages or overstocking. Proper estimation ensures efficiency and cost-effectiveness, preventing delays during installation.
- Measure wall dimensions precisely, including obstructions.
- Calculate total materials with an additional 10-15% for waste.
- Verify calculations to avoid errors or shortages.
Installation Process
Begin with a level surface, ensuring proper alignment. Secure the starter strip, then attach panels vertically, overlapping edges as specified. Use compatible fasteners and seal gaps. Finish with trim for a polished look.
- Start with a level surface for accuracy.
- Attach panels vertically, overlapping edges correctly.
- Seal gaps and add trim for completion.
3.1 Preparing the Wall Surface
Before installing vertical metal siding, ensure the wall surface is clean, dry, and even. Remove any old siding, debris, or obstacles. Check for structural damage and repair it. Use a level to verify the surface is plumb and even. If necessary, install a weather-resistant barrier to protect the wall. Ensure all surfaces are clear of dust, dirt, and moisture for proper siding adhesion. Address any uneven areas by installing furring strips or plywood for a smooth finish. Proper preparation ensures a secure and professional-looking installation.

- Clean and inspect the wall surface thoroughly.
- Repair any structural issues or damage.
- Ensure the surface is even and dry before proceeding.
3.2 Starting the Installation
- Mark the wall for panel alignment.
- Install the first panel at the bottom.
- Ensure panels are plumb and level.
3.3 Fastening the Panels
Secure each panel to the wall using screws or nails, ensuring they are driven through the designated fastening holes. Panels should be spaced evenly, typically 12-24 inches apart, depending on the manufacturer’s recommendations. Use a level to maintain proper alignment and prevent warping. Avoid overtightening, as this can damage the metal. Fasteners should penetrate the framing or studs for maximum stability. For corrugated or ribbed panels, align screws with the ridges to ensure a flush finish. Double-check all fasteners to ensure they are snug but not overly tightened, allowing for slight expansion and contraction due to temperature changes.
- Use screws or nails with washers to prevent water intrusion.
- Space fasteners evenly for structural integrity.
- Avoid overtightening to prevent panel damage.
3.4 Installing Flashing and Trim

Flashing and trim are crucial for sealing gaps and protecting edges from weather damage. Begin by installing flashing around doors, windows, and corners to direct water away from the panels. Use pre-formed or custom-bent flashing materials that match your siding’s style. Secure trim pieces along the top, bottom, and sides of the siding, ensuring they fit snugly around edges. Apply sealant to all joints and gaps to prevent moisture infiltration. Trim should be fastened with screws, spaced evenly to maintain structural integrity. Proper installation ensures a seamless and weather-tight finish for your vertical metal siding system.
- Apply sealant to all joints and gaps.
- Ensure trim fits snugly around edges.
- Use flashing to direct water away from panels.

Finishing Touches
Complete the installation by trimming excess material, sealing gaps, and ensuring all joints are watertight. Inspect the siding for alignment and damage, making necessary adjustments. Final touches enhance durability and appearance.
- Trim excess material for clean edges.
- Seal gaps to prevent moisture ingress.
- Inspect for alignment and damage.
4.1 Trimming and Cutting Panels
Trimming and cutting vertical metal siding panels requires precision to ensure proper fit and appearance. Use a sliding miter saw or tin snips for clean cuts. Always wear safety gloves and goggles. Measure panels carefully, marking cut lines with a pencil. Double-check measurements before cutting to avoid waste. For curved cuts, consider using a jigsaw with a metal-cutting blade. Remove sharp edges with a file or grinder. Proper cutting ensures seamless installation and prevents damage to surrounding materials.
Accurate cutting is essential for a professional-looking finish.
4.2 Sealing Gaps and Joints
Sealing gaps and joints is crucial for ensuring weather tightness and preventing moisture infiltration. Use high-quality exterior sealants or weatherproof tape to fill gaps between panels and surrounding surfaces. Apply a bead of sealant along the edges of flashing and trim before securing them in place. For joints between panels, use a silicone-based spray or caulk designed for metal surfaces. Ensure all seams are tightly sealed to maintain the integrity of the siding system. Regularly inspect and reseal gaps as needed to prevent leaks and damage over time.
- Use weatherproof materials for durability.
- Apply sealants evenly for consistent protection.
- Inspect joints annually for maintenance.
Proper sealing ensures long-lasting performance and protection.
4.3 Final Inspection and Touch-ups
After completing the installation, conduct a thorough inspection to ensure all panels are securely fastened and aligned properly. Check for any gaps, misaligned joints, or loose fasteners. Address any issues by tightening screws or adjusting panels as needed. Touch up any scratches or dents with matching paint to maintain the siding’s appearance. Finally, walk through the project with the homeowner to ensure satisfaction and provide guidance on maintenance. This step ensures a polished finish and long-term durability of the vertical metal siding system.
- Inspect all panels and joints for alignment and security.
- Touch up any damaged areas with matching paint.
- Ensure all fasteners are tight and properly sealed.
A final review guarantees a professional and lasting result.
Maintenance and Repair
Regular cleaning and inspections are essential to maintain the integrity of vertical metal siding. Address any damage promptly to prevent further issues and ensure longevity.
- Clean panels regularly to remove dirt and debris.
- Inspect for dents, scratches, or loose fasteners.
- Touch up damaged areas to prevent rust or corrosion.
Proper upkeep ensures your siding remains durable and visually appealing.
5.1 Regular Maintenance Tips
Regular maintenance is crucial for preserving the appearance and functionality of vertical metal siding. Start by cleaning the panels with a mild detergent and water to remove dirt and grime. Use a soft-bristle brush to avoid scratching the surface. Inspect the siding for dents, scratches, or loose fasteners and address these issues promptly. Check seams and joints for gaps, ensuring they are sealed properly. Trim nearby vegetation to prevent moisture buildup, which can lead to rust or corrosion. Schedule professional inspections every few years to identify and fix potential problems before they escalate.
Consistent upkeep ensures long-lasting durability and curb appeal.
5.2 Repairing Damaged Panels
Repairing damaged vertical metal siding panels is essential to maintain the structural integrity and appearance of your home. Start by assessing the extent of the damage. For minor dents or scratches, use a dent repair kit or touch-up paint specifically designed for metal. If panels are severely damaged, remove them carefully and replace with new ones, ensuring proper alignment and fastening. Clean the area before making repairs to prevent dirt from interfering with adhesion or sealing. Always follow manufacturer guidelines for repair materials and techniques to ensure a seamless fix. Regular inspections can help catch issues early, preventing costly repairs later.
- Assess damage and gather necessary tools and materials.
- Clean the affected area thoroughly.
- Repair or replace damaged panels as needed.
- Seal gaps to prevent water intrusion and corrosion.
Addressing damage promptly ensures the siding remains protective and visually appealing.
5.3 Troubleshooting Common Issues
Common issues with vertical metal siding include water leakage, panel misalignment, and fastener loosening. Inspect for gaps in flashing or joints, as these often cause leaks. Check panel alignment and tighten fasteners if necessary. If panels are dented or warped, consider replacing them. Address rust spots immediately by sanding and repainting. Regularly clean debris from gaps to prevent damage. For persistent problems, consult the manufacturer’s guidelines or contact a professional. Early detection and resolution of issues ensure long-term durability and performance of your vertical metal siding system.
- Inspect flashing and joints for gaps.
- Check panel alignment and fasteners.
- Address rust and debris promptly.
Proactive troubleshooting prevents costly repairs and extends siding lifespan.
Additional Resources
Access downloadable PDF guides, manufacturer manuals, and troubleshooting tips for vertical metal siding installation. Visit official websites or contact manufacturers for detailed support materials.
- Downloadable PDF guides for step-by-step instructions.
- Manufacturer installation manuals for specific product details.
- Troubleshooting tips and FAQs for common issues.
Enhance your installation process with these valuable resources!
6.1 Downloadable PDF Guides
Downloadable PDF guides provide comprehensive instructions for vertical metal siding installation. These resources, available on official websites and manufacturer portals, offer detailed step-by-step processes, diagrams, and material checklists. They often include troubleshooting sections to address common issues. Ensure to access the latest versions for updated information and compliance with current standards. These guides are essential for both professionals and DIY enthusiasts, covering preparation, panel installation, and finishing touches. Refer to these documents for a seamless and successful installation experience.
- Step-by-step installation instructions.
- Detailed diagrams and visual aids.
- Material checklists and specifications.
- Troubleshooting tips for common challenges.
Download these guides to ensure a flawless installation process!
6.2 Manufacturer Installation Manuals
Manufacturer installation manuals are tailored to specific products and provide precise instructions for vertical metal siding. These documents include detailed diagrams, tool lists, and safety guidelines, ensuring compliance with manufacturer standards. They often cover troubleshooting and warranty information, making them indispensable for professionals and DIYers. Always refer to the manual for your specific siding type, as instructions may vary. These resources complement downloadable guides, offering brand-specific insights for a flawless installation. Ensure to follow the manufacturer’s recommendations for optimal results and adherence to product warranties.
- Brand-specific installation instructions.
- Detailed diagrams and product specifications.
- Troubleshooting and maintenance tips.
- Warranty and compliance information.
Consult your manufacturer’s manual for precise installation guidance!